Firebase Genkitを試してみた
Firebase Genkit は、本番環境に対応した AI 搭載アプリの構築、デプロイ、モニタリングに役立つオープンソース フレームワークです。
今回、以下を試してみます。
- ブラウザからFirebase Functionを呼び出し実行
- Firebase Local Emulator Suiteを使ってローカルで開発
- Cloud Firestore vector storeを使ってRAG(Retrieval Augmented Generation)のインデックス作成と検索を行う
- モデルにGoogle AIのGemini ProとOpenAIのGPT-4oを使う
セットアップ
ここを参考にしています。
Node.jsのバージョン20以降が必要です。
Google AIのGeminiを使うため、Generative Language APIを有効にし、APIキーを作成しておきます。
空のディレクトリを作成し、そこで以下のコマンドを実行し、いくつかの質問に答えるとFirebaseプロジェクトが作成されます。
firebase init genkit
質問の中でサンプルフローを生成するか聞かれますので、「Y」を選択します。
Gemini APIキーを環境変数にセットします。
export GOOGLE_GENAI_API_KEY=*********
functionsディレクトリでnpm run buildでビルドした後、以下を実行しエミュレータを起動します。
GENKIT_ENV=dev firebase emulators:start --inspect-functions
さらに以下を実行しGenkit Dev UIを起動します。
genkit start --attach http://localhost:3100 --port 4001
ブラウザでhttp://localhost:4001/ にアクセスすると、サンプルフローのmenuSuggestionFlowがあります。試しに、Auth JSONに{"uid": 0,"email_verified": true}を入力し(サンプルコードでメール確認済ユーザのみとなっている)、input JSONに「牛丼」と入れてみました。
結果、以下のような 汁だく特盛牛丼を提案されました。
**"Gyu-don Grande"**

A super-sized portion of traditional gyudon, featuring:

* Double the amount of tender and juicy beef
* Extra fluffy rice with a hint of soy sauce and mirin glaze
* Ample servings of savory onions
* Topped with a generous drizzle of umami-rich sauce
* Served in a large bowl taller than a skyscraper

Pairs well with:

* Miso soup
* Cold soba noodles
* Pickled side dishes
インデックス作成
Cloud Firestore vector storeを使ったインデックス作成します。
ここを参考にしています。
エミュレータでFirestoreを使うので、firebase init emulatorsを実行し、Firestore Emulatorを使えるように設定します。ついでに後で認証とホスティングも使うのでAuthentication emulatorとHosting Emulatorも使えるように設定しておきます。
あと、firebase init hostingでホスティング用の設定ファイルを作成しておきます。
以下の内容のファイルをfunctions/src/populate_collection.tsに作成します。
処理内容は以下です。
- テキストファイル
functions/company.txtを読んで、改行2つを区切りとしてチャンクに分ける - textEmbeddingGecko001でエンベディングしベクター情報とチャンクをFirestoreのコレクション「company」に保存
import { configureGenkit } from "@genkit-ai/core";
import { embed } from "@genkit-ai/ai/embedder";
import { defineFlow, run } from "@genkit-ai/flow";
import { textEmbeddingGecko001, googleAI } from "@genkit-ai/googleai";

import { FieldValue, getFirestore } from "firebase-admin/firestore";

import { chunk } from "llm-chunk";
import * as z from "zod";

import { readFile } from "fs/promises";
import path from "path";

const indexConfig = {
  collection: "company",
  contentField: "text",
  vectorField: "embedding",
  embedder: textEmbeddingGecko001,
};

configureGenkit({
  plugins: [googleAI()],
  enableTracingAndMetrics: false,
});

const firestore = getFirestore();

// Firebase functionにしないのでonFlowではなくdefineFlow関数を使う
export const indexFlow = defineFlow(
  {
    name: "indexFlow",
    inputSchema: z.void(),
    outputSchema: z.void(),
  },
  async () => {
    const filePath = path.resolve('./company.txt');

    const txt = await run("extract-text", () =>
      extractText(filePath)
    );

    // 改行2つを区切りとしてチャンク作成
    const chunks = await run("chunk-it", async () => chunk(txt, {delimiters: '\n\n' }));

    // Add chunks to the index.
    await run("index-chunks", async () => indexToFirestore(chunks));
  }
);

async function indexToFirestore(data: string[]) {
  for (const text of data) {
    const embedding = await embed({
      embedder: indexConfig.embedder,
      content: text,
    });
    await firestore.collection(indexConfig.collection).add({
      [indexConfig.vectorField]: FieldValue.vector(embedding),
      [indexConfig.contentField]: text,
    });
  }
}

async function extractText (filePath: string) {
  const f = path.resolve(filePath);
  return await readFile(f, 'utf-8');
}
上記を実行するため、functions/src/index.tsに以下を追加します。
export { indexFlow } from './populate_collection';
結果、Genkit Dev UIのフローに「indexFlow」が追加されました。
input JSONに何も入力せず、「RUN」ボタンを押します。
成功すると、Firestoreにcompanyコレクションが作成されます。
エミュレータで確認してみると、embeddingとtextフィールドを持つドキュメントが複数あり、embedding.valueにはベクター情報があります。
RAGのプロンプト生成
functions/src/index.tsを以下の内容に置き換えます。
import {retrieve} from "@genkit-ai/ai";
import {configureGenkit} from "@genkit-ai/core";
import {firebaseAuth} from "@genkit-ai/firebase/auth";
import {onFlow} from "@genkit-ai/firebase/functions";
import {geminiPro, textEmbeddingGecko001} from "@genkit-ai/googleai";
import * as z from "zod";
import {defineFirestoreRetriever, firebase} from "@genkit-ai/firebase";
import {googleAI} from "@genkit-ai/googleai";
import { getFirestore } from "firebase-admin/firestore";
import { defineDotprompt } from '@genkit-ai/dotprompt';
import { initializeApp } from "firebase-admin/app";
import { dotprompt } from '@genkit-ai/dotprompt';

initializeApp()

configureGenkit({
  plugins: [
    dotprompt(),
    firebase(),
    googleAI(),
  ],
  flowStateStore: 'firebase',
  logLevel: 'debug',
  traceStore: 'firebase',
  enableTracingAndMetrics: true,
});

const firestore = getFirestore();

const retrieverRef = defineFirestoreRetriever({
  name: "companyRetriever",
  firestore,
  collection: "company",
  contentField: "text",
  vectorField: "embedding",
  embedder: textEmbeddingGecko001,
  distanceMeasure: "COSINE", // "EUCLIDEAN", "DOT_PRODUCT", or "COSINE" (default)
});


const CompanyQuestionInputSchema = z.object({
  data: z.array(z.string()),
  question: z.string(),
});

const companyPrompt = defineDotprompt(
  {
    name: 'companyPrompt',
    model: geminiPro,
    input: { schema: CompanyQuestionInputSchema },
    output: { format: 'text' },
    config: { temperature: 0.3 },
  },
  `
あなたは有限会社ランカードコムの広報担当者です。
以下は有限会社ランカードコムの会社概要です。
{{#each data~}}
- {{this}}
{{~/each}}

会社概要を元に以下のカスタマーの質問に回答してください:
{{question}}?
`
);

export const companyFlow = onFlow(
  {
    name: "companyFlow",
    inputSchema: z.string(),
    outputSchema: z.string(),
    authPolicy: firebaseAuth((user) => {
      if (!user.email_verified) {
        throw new Error("Verified email required to run flow");
      }
    }),
  },
  async (question) => {
    const docs = await retrieve({
      retriever: retrieverRef,
      query: question,
      options: {limit: 5},
    });
    const llmResponse = await companyPrompt.generate({
      input: {
        data: docs.map(doc => doc.content[0].text || ''),
        question,
      },
    });

    return llmResponse.text();
  }
);

export { indexFlow } from './populate_collection';
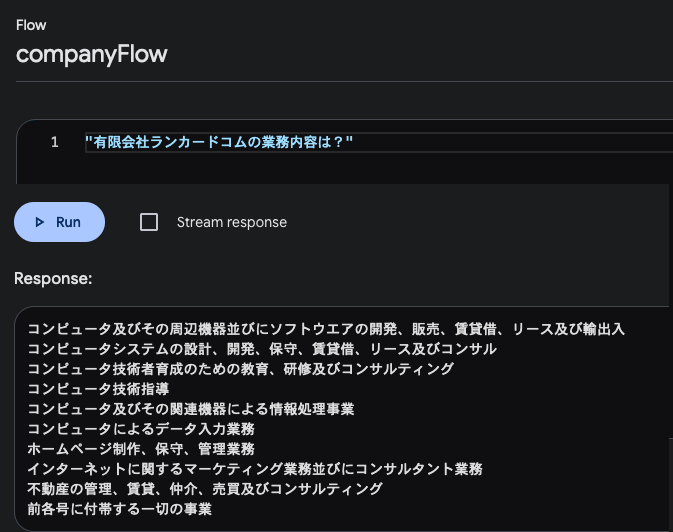
Genkit Dev UIのフローcompanyFlowでAuth JSONに{"uid": 0,"email_verified": true}を入力し、適当な質問をinput JSONに入力し実行すると、正しく回答が返ってきました。

モデルをOpenAIのGPT-4oに変更
genkitx-openaiを使います。
cd functions
npm i genkitx-openai
- import {geminiPro, textEmbeddingGecko001} from "@genkit-ai/googleai";
- import {googleAI} from "@genkit-ai/googleai";
+ import { gpt4o, openAI, textEmbedding3Small } from "genkitx-openai";
googleAIをopenAIに、geminiProをgpt4o、textEmbeddingGecko001をtextEmbedding3Smallに置換します。
OpenAIの環境変数をセットし、エミュレータを起動します。
export OPENAI_API_KEY=*************
GENKIT_ENV=dev firebase emulators:start --inspect-functions
indexFlowでインデックス作成し、companyFlowで正しく回答されるか確認します。
ブラウザからFirebase Functionを呼び出し実行
public/index.htmlを以下の内容に書き換えます。
ここの4.Replace public/index.html with the following:を、エミュレータで動作するように修正しました。
<!doctype html>
<html>
  <head>
    <title>Genkit demo</title>
  </head>
  <body>
    <div id="signin" hidden>
      <button id="signinBtn">Sign in with Google</button>
    </div>
    <div id="callGenkit" hidden>
      <div>有限会社ランカードコムについてお聞きください。</div>
      <textarea id="question" rows="5" cols="33"></textarea>
      <div>
        <button id="submit">送信</button>
      </div>
      <p id="answer"></p>
    </div>
    <script type="module">
      import { initializeApp } from 'https://www.gstatic.com/firebasejs/10.10.0/firebase-app.js';
      import {
        getAuth,
        connectAuthEmulator,
        onAuthStateChanged,
        GoogleAuthProvider,
        signInWithPopup,
      } from 'https://www.gstatic.com/firebasejs/10.10.0/firebase-auth.js';
      import {
        getFunctions,
        httpsCallable,
        connectFunctionsEmulator
      } from 'https://www.gstatic.com/firebasejs/10.10.0/firebase-functions.js';
      import {
        getFirestore,
        connectFirestoreEmulator
      } from 'https://www.gstatic.com/firebasejs/10.10.0/firebase-firestore.js';
      const firebaseConfig = await fetch('/__/firebase/init.json');
      const firebaseApp = initializeApp(await firebaseConfig.json());

      if (location.hostname === 'localhost') {
        const auth = getAuth(firebaseApp)
        const firestore = getFirestore(firebaseApp)
        const functions = getFunctions(firebaseApp)

        connectFirestoreEmulator(firestore, location.hostname, 8080, { ssl: false })
        connectFunctionsEmulator(functions, location.hostname, 5001)
        connectAuthEmulator(auth, `http://${location.hostname}:9099`)
      }


      async function generateAnswer() {
        const companyFlow = httpsCallable(
          getFunctions(),
          'companyFlow'
        );
        const question = document.querySelector('#question').value;
        const response = await companyFlow(question);
        document.querySelector('#answer').innerText = response.data;
      }

      function signIn() {
        signInWithPopup(getAuth(), new GoogleAuthProvider());
      }

      document
        .querySelector('#signinBtn')
        .addEventListener('click', signIn);
      document
        .querySelector('#submit')
        .addEventListener('click', generateAnswer);

      const signinEl = document.querySelector('#signin');
      const genkitEl = document.querySelector('#callGenkit');

      onAuthStateChanged(getAuth(), (user) => {
        if (!user) {
          signinEl.hidden = false;
          genkitEl.hidden = true;
        } else {
          signinEl.hidden = true;
          genkitEl.hidden = false;
        }
      });
    </script>
  </body>
</html>
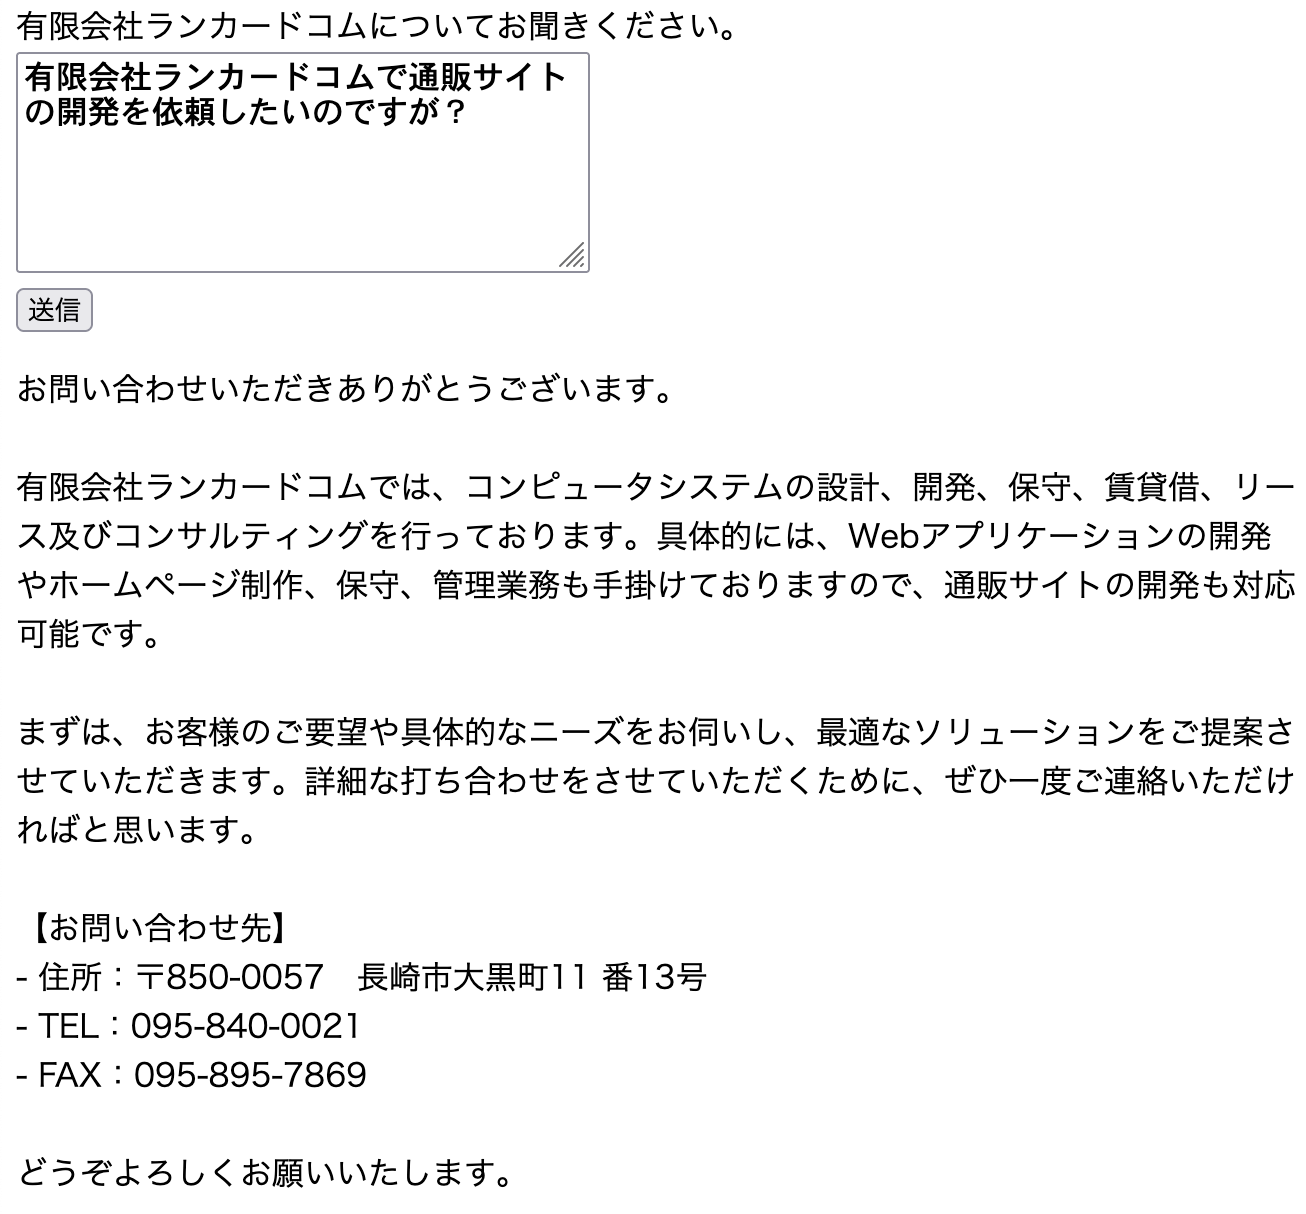
http://localhost:5002/にアクセスし、「Sign in with Google」ボタンを押すとエミュレータのAuthenticationにアカウントを作成できます。テキストエリアに質問入力し送信し、回答が返ってくれば成功です。
回答例

課題
ストリームで回答出力
Genkit側ではgenerateStreamでストリーム出力できますが、onFlow(https.onCallのプロトコルに準拠)を使って、ブラウザにどうやって逐次データを返せばいいのか、分かりませんでした。Firestoreにチャンクデータを逐次保存すれば、onSnapshotでストリーミングでデータを返すことはできますが、課金および速度的にいい方法とは思えません。
Firebase Genkitはまだベータ版なので、今後Firebase functionsでストリーミングで返せるようになることを期待しています。
2024/08/01追記
onFlowを使わず、onRequestを使えば、ストリームで回答出力できました。onRequestはHTTPプロトコルなので、サーバー送信イベント (Server-Sent Events、SSE) を使うことができ、これを使いました。ただ作成したdefineFlowをonRequestに書き直すのは面倒です。
onFlowのような感じでonRequestのプロトコルを持つフローを作成するGenkitのプラグインがあれば良いのですが。
