Google Sheet APIを使う – Token取得編
- 2024/11/21
- aikawa
APIの使用には、Tokenが必要になりますので、今回は前回作成したOAuthのjsonファイルを使って、Tokenを取得するまでです。
認証用URLを生成
ユーザーにアクセスさせて、Googleの認証を行わせるURLを生成します。OAuthエンドポイントやClientの設定
その前にURLやclient等の定義を共通で使いまわせるようにしておきます。使用したのはPHPです。
define('OAUTH_URL', 'https://accounts.google.com/o/oauth2/v2/auth');   // Oauthで権限scopeを登録するURL
define('TOKEN_URL', 'https://oauth2.googleapis.com/token'); // Tokenの取得・更新用URL
define('SHEET_URL', 'https://sheets.googleapis.com/v4/spreadsheets');
define('USER_URL', 'https://openidconnect.googleapis.com/v1/userinfo');
//
define('OAUTH_REDIRECT', '[プロジェクトで入力したリダイレクトURI]'); // 各自置き換え

// OAuth
$path = '[ダウンロードしたOAuthクライアントのjsonファイルパス]';
$GoogleAPI = json_decode(file_get_contents($path), true);
define('CLIENT_ID', $GoogleAPI['web']['client_id']);
define('CLIENT_SECRET', $GoogleAPI['web']['client_secret']);
認証用URLを生成
下記で生成するURLは、一度のみ使用可能なタイプにしているので、都度生成する必要が有ります。// state example // redirect先で受け取らせたいパラメータ
$StateParams = ['fbid'=>$fbid];
$state = urlencode(http_build_query($StateParams));
// Get Params
$Get = [
'response_type'=>'code',
'client_id'=>CLIENT_ID,
'scope'=>'openid profile email https://www.googleapis.com/auth/drive.file',
'redirect_uri'=>OAUTH_REDIRECT,
'state'=>$state,
'nonce'=>bin2hex(random_bytes(128/8)),
'access_type' => 'offline',
'prompt' => 'consent',
'include_granted_scopes' => 'true',
];
// create url
$url = OAUTH_URL.'?'.http_build_query($Get);
echo $url;
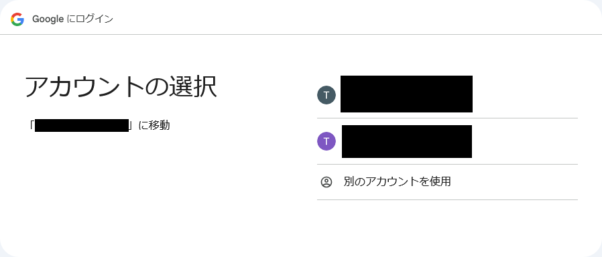
- テストモードでは、「このアプリは Google で確認されていません」と表示されますので、続行を押します。
- 次へをクリック。
- 「[ドメイン名等] が Google アカウントへのアクセスを求めています」 でスコープ権限が表示されるので、チェック項目が有ればチェックし、続行をクリック。
リダイレクト先での作業
GETパラメータで、codeやstate,scope等を受け取るので、codeを使ってTokenを取得します。
※defineについては、前記参照。
※curlについては省略するので、適当に作成してPOSTして下さい。
※defineについては、前記参照。
※curlについては省略するので、適当に作成してPOSTして下さい。
$Post = [
    'code' => $_GET['code'],
    'client_id' => CLIENT_ID,
    'client_secret' => CLIENT_SECRET,
    'redirect_uri' => OAUTH_REDIRECT,
    'grant_type' => 'authorization_code',
    'access_type' => 'offline',
];
// get token
$curl = new Curl(); // WebにPOST出来るクラスを作っておく
$res = $curl->post(TOKEN_URL, $Post); // POSTメソッドを作っておく
$Json = json_decode($res, true) + ['GET'=>$_GET];
file_put_contents('/save/google_token.json', $res); // 保存しておく
refresh_tokenでtokenの更新
取得したaccess_tokenの有効時間は1時間です。なので基本的には都度トークンを更新する必要が有ります。$Data = [
'client_id' => CLIENT_ID,
'client_secret' => CLIENT_SECRET,
'grant_type' => 'refresh_token',
'refresh_token'=> $Json['refresh_token'],
];
$curl = new Curl(); // WebにPOST出来るクラスを作っておく
$str = $curl->post(TOKEN_URL, $Data); // POSTメソッドを作っておく
$TokenJson = json_decode($str, true) + ['create_at'=>date('Y-m-d H:i:s')];
// access_tokenを更新する処理
...