Roundcubeプラグイン フックを設置する

Roundcubeでフックを設置する方法を紹介します。

今回はsample_aプラグインにフックを設置し、それをsample_bから利用する例です。
sample_aは画面をもったプラグインでボタンをクリックしたら、フックを実行し
元の画面を再度表示するようにしています。

ソースは以下のようになります。
sample_a.php

rc = rcmail::get_instance();

//ローカライズ対応
$this->add_texts('localization/');

//タスクとしてsample_aを設定
$this->register_task('sample_a');

//タスクバーにボタンを追加
$this->add_button(array(
'command'    => 'sample_a',
'label'      => 'sample_a.sample',
), 'taskbar');

//sampleタスクの場合のみ、アクションのコールバックを登録
if($this->rc->task == 'sample_a'){
$this->register_action('index', array($this, 'action'));
$this->register_action('fook_test', array($this, 'action'));
}
}

public function action(){
if($this->rc->action === 'fook_test'){
$data = $this->rc->plugins->exec_hook('sample_hook', array('data_a' => 'hoge'));
error_log(print_r($data,true));
}
$this->rc->output->send('sample_a.index');
}
}
?>

index.html


<roundcube:object name="pagetitle" />


sample_b.php

add_hook('sample_hook', array($this, 'set_data'));
}

public function set_data($args){
error_log(print_r($args,true));
$data['data_b'] = "foo";
return $data;
}
}
?>

①フックを設置するコードは以下の部分になります。

$data = $this->rc->plugins->exec_hook('sample_hook', array('data_a' => 'hoge'));

引数として配列を渡しています。

②フックを利用するコードは以下の部分になります。

function init(){
$this->add_hook('sample_hook', array($this, 'set_data'));
}

public function set_data($args){
error_log(print_r($args,true));
$data['data_b'] = "foo";
return $data;
}

このような配列が渡されてきます。
(
  [data_a] => hoge
  [abort] =>
)

渡された引数を処理して戻り値を返したりすることが出来ます。
戻り値はこのようになります。
(
  [data_b] => foo
  [data_a] => hoge
  [abort] =>
)

exec_hookの定義が以下のようになっているため、戻り値が配列の場合は自動的に
渡された配列に足して返されます。

  public function exec_hook($hook, $args = array())
  {
    if (!is_array($args))
      $args = array('arg' => $args);

    $args += array('abort' => false);
    $this->active_hook = $hook;

    foreach ((array)$this->handlers[$hook] as $callback) {
      $ret = call_user_func($callback, $args);
      if ($ret && is_array($ret))
        $args = $ret + $args;

      if ($args['abort'])
        break;
    }

    $this->active_hook = false;
    return $args;
  }
Facebooktwitterlinkedintumblrmail

Roundcubeプラグイン ユーザー情報の取得方法

Roundcubeでのユーザー情報の取得方法について紹介します。

①ユーザー情報
ユーザー情報の取得方法は以下のようになります。

$rc = rcmail::get_instance();
$user_data = $rc->user->data;
error_log(print_r($user_data,true));

このような情報が取得できます。

(
    [user_id] => 4
    [username] => foo
    [mail_host] => 192.168.15.117
    [alias] => 
    [created] => 2013-04-11 10:14:23
    [last_login] => 2013-05-17 07:45:24
    [language] => ja_JP
    [preferences] => a:5:{s:16:"message_sort_col";s:7:"subject";s:18:"message_sort_order";s:3:"ASC";s:8:"timezone";s:4:"auto";s:4:"skin";s:5:"larry";s:17:"message_threading";a:0:{}}
)

②識別情報
Roundcubeでは設定画面から識別情報を登録出来ます。

以下のようにして識別情報を取得出来ます。

$rc = rcmail::get_instance();
$identity = $rc->user->get_identity();
error_log(print_r($identity,true));
(
    [identity_id] => 4
    [user_id] => 4
    [changed] => 2013-05-17 12:28:06
    [del] => 0
    [standard] => 1
    [name] => テスト
    [organization] => bar
    [email] => foo@roundcube.com
    [reply-to] => hoge@roundcube.com
    [bcc] => test@roundcube.com
    [signature] => 署名
    [html_signature] => 0
)

③特定のユーザーの情報を取得する方法。

$rc = rcmail::get_instance();
$identity = $rc->user->get_identity();

上記のようにユーザー情報を取得する場合、ログインユーザーの情報を取得します。

その理由は、rcmailクラスの188行目が以下のようになっているからです。

    // create user object
    $this->set_user(new rcube_user($_SESSION['user_id']));

ということで、Roundcubeのuser_idがわかれば、rcube_userクラスをインスタンス化し
ユーザー情報やユーザーの識別情報を取得出来ます。

例えば、次のようになります。

$user_id = 4;
$user = new rcube_user($user_id);
$user_data = $user->data;
$user_identity = $user->get_identity();
error_log(print_r($user_data,true));
error_log(print_r($user_identity,true));
Facebooktwitterlinkedintumblrmail

Roundcubeプラグイン設定ファイルの利用方法

Roundcubeプラグイン設定ファイルの利用方法を紹介します。

以下のように設定ファイルを用意します。

ソースは以下のようになります。

sample.php

rc = rcmail::get_instance();

//設定ファイルをロード
$this->load_config('config/config.inc.php');
}

function init() {
$name = $this->rc->config->get('sample.user', '');
error_log('name:'.$name);
}

}

config.inc.php


割と簡単に使えるようです。

rc->config->get('sample.user', '');
?>

ここのconfigの実態はrcube_configオブジェクトになります。
getメソッドの第二引数は値が取得出来なかった場合のデフォルト値になります。

注意点としては


コンストラクタの中で親クラスであるrcube_pluginのコンストラクタを
必ず呼び出す必要があります。

rcube_pluginクラスのコンストラクタは以下のようになっています。

ID = get_class($this);
    $this->api = $api;
    $this->home = $api->dir . $this->ID;
    $this->urlbase = $api->url . $this->ID . '/';
  }
?>

homeディレクトリなどの値を設定しています。

そして、rcube_pluginクラスのload_configメソッドは以下のようになっています。

home.'/'.$fname;
    $rcmail = rcmail::get_instance();
    if (is_file($fpath) && !$rcmail->config->load_from_file($fpath)) {
      raise_error(array('code' => 527, 'type' => 'php',
        'file' => __FILE__, 'line' => __LINE__,
        'message' => "Failed to load config from $fpath"), true, false);
      return false;
    }

    return true;
  }
?>

ここで設定ファイルの場所を取得するためにhome変数を使用しているため
rcube_pluginクラスのコンストラクタを呼び出していないと設定ファイルを取得出来なくなります。

Facebooktwitterlinkedintumblrmail

Roundcubeプラグインからメール送信

Roundcubeプラグインからメール送信出来たら、色々な可能性が広がるので調べてみました。

ソースは以下のようになります。

rc = rcmail::get_instance();

//ローカライズ対応
$this->add_texts('localization/');
        
//タスクとしてsampleを設定
$this->register_task('sample');
        
//タスクバーにボタンを追加
$this->add_button(array(
'command'    => 'sample',
'label'      => 'sample.sample',
), 'taskbar');

//sampleタスクの場合のみ、アクションのコールバックを登録
if($this->rc->task == 'sample'){
$this->register_action('index', array($this, 'index'));
$this->register_action('send_mail', array($this, 'send_mail'));
}
}

public function index(){
$this->rc->output->send('sample.index');
}

public function send_mail(){
global $CONFIG;
$message_charset = $this->rc->output->get_charset();//rcube_html_pageオブジェクトの持っている、charsetを取得します。
$flowed = $this->rc->config->get('send_format_flowed', true);

$from = 'foo@roundcube.com';
$to = 'bar@roundcube.com';

$headers = array(
'Date' => rcmail_user_date(),
'From' => $from,
'To' => $to,
'Message-ID' => rcmail_gen_message_id(),
'User-Agent' => $CONFIG['useragent'],
'Subject' => 'テストメール',
'X-Sender' => $to,
);
$mail_mime = new Mail_mime("\r\n");
$mail_mime->headers($headers);

//$mail_mime->setTXTBody('こんにちは');
$mail_mime->setHTMLBody('こんにちは');

//ASCII文字か判定
if (preg_match('/[^\x00-\x7F]/', $mail_mime->getTXTBody())){
$transfer_encoding = $this->rc->config->get('force_7bit') ? 'quoted-printable' : '8bit';
}else{
$transfer_encoding = '7bit';
}

//文字コードなどヘッダフィールドの設定
$mail_mime->setParam('text_encoding', $transfer_encoding);
$mail_mime->setParam('html_encoding', 'quoted-printable');
$mail_mime->setParam('head_encoding', 'quoted-printable');
$mail_mime->setParam('head_charset', $message_charset);
$mail_mime->setParam('html_charset', $message_charset);
$mail_mime->setParam('text_charset', $message_charset . ($flowed ? ";\r\n format=flowed" : ''));

//ヘッダ情報の配列をテキスト形式に変換します。
$smtp_headers = $mail_mime->txtHeaders($headers, true);

if (!is_object($this->rc->smtp)){
//rcmailオブジェクトにrcube_smtpクラスのオブジェクトがない場合、生成します。
$this->rc->smtp_init(true);
}

//メールを送信します。
$sent = $this->rc->smtp->send_mail($from, $to, $smtp_headers, $mail_mime->getMessageBody());

//必要な場合以下の情報で後処理をする。
//$smtp_response = $this->rc->smtp->get_response();
//$smtp_error = $this->rc->smtp->get_error();

//元の画面を再表示
$this->index();
}

}

/roundcuberoot/program/steps/mail/sendmail.incを参考に作成しています。
この内容でほとんどのメールは送信可能かと思います。
添付ファイルをつけたメール送信や画像を含んだメールなどはさらに処理が必要になります。

Facebooktwitterlinkedintumblrmail

Roundcubeプラグインの作り方② ~画面のあるプラグイン編~

今回は、Roundcubeプラグインとして、画面のあるプラグインの作り方を紹介します。

まず、初めにフォルダ構成は以下のようになります。

ソースの内容は以下のようになります。
sample.php

rc = rcmail::get_instance();
        
        //ローカライズ対応
        $this->add_texts('localization/');
        
        //タスクとしてsampleを設定
        $this->register_task('sample');
        
        //タスクバーにボタンを追加
        $this->add_button(array(
            'command'    => 'sample',
            'label'      => 'sample.sample',
        ), 'taskbar');
        
        //sampleタスクの場合のみ、アクションのコールバックを登録
        if($this->rc->task == 'sample'){
            $this->register_action('index', array($this, 'index'));
            $this->register_action('test', array($this, 'test'));
        }
        
    }
    
    public function index(){
        $this->rc->output->send('sample.index');
    }
    
    public function test(){
        $this->rc->output->send('sample.test');
    }
    
}

index.html


<roundcube:object name="pagetitle" />


初期画面

test.html


<roundcube:object name="pagetitle" />


テスト画面

ja_JP.inc


この状態でこのように動きます。
初期画面

テスト画面

ここからはソースの説明になります。

①全てのリクエストは、プラグインクラスが受け付けます。
  プラグインクラスとは、rcube_pluginを継承したクラスになります。
  今回の場合、sampleクラスになります。

②タスクとアクション
  Roundcubeにはタスクとアクションの概念があります。
  1つのプラグインの中に1つのタスクがあり、複数のアクションがあるイメージになります。
  今回の場合は、sampleタスクの中にindexアクションとtestアクションがある状態になります。

  例えば、「http://roundcube.com/?_task=sample&_action=test」のようにアクセスすると
  タスクはsampleで、アクションはtestという指定で動作します。
  「http://roundcube.com/?_task=sample」このようなURLの場合
  アクションは何もついていませんので、indexというアクションが自動的に付加されます。

③rcmailオブジェクト

$this->rc = rcmail::get_instance();

  Roundcubeの様々な情報を持っているオブジェクトになります。
  ここにタスクとアクションの情報も入っていますので、メンバ変数に保持します。

④コールバックの登録
  あるアクションが指定されたときに、どのメソッドがコールされるかを登録します。

    $this->register_action('index', array($this, 'index'));
この場合はindexというアクションが指定されたら、
$thisの中にあるindexメソッドをコールするという登録方法になります。

⑤テンプレート表示

    $this->rc->output->send('sample.index');
上記のように記述することで、sampleタスク内にあるindex.htmlを表示するようにします。
Facebooktwitterlinkedintumblrmail

Eclipse RCPの作り方

Eclipse RCPの作り方を紹介します。

(といっても、久しぶりに作ろうと思ったら忘れていたので
今度は忘れないように自分のためのログですが・・。)

①Eclipse RCP
  Eclipse Rich Client Platformの略で、EclipseとJavaの資産が
  使えることが利点になります。

  さらに、一度ソースを書くとWindows Mac Linuxなど
  様々なOS用にコンパイルすることが出来ます。

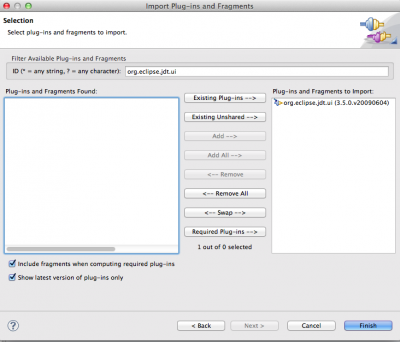
②プラグインプロジェクトの作成
  Eclipseには内蔵ブラウザがあるので、ブラウザを使ったものを作ってみます。

  1.プラグインプロジェクトを選択します。


  2.リッチクライアントアプリケーションを作成の部分は「はい」を選択して下さい。
   「いいえ」を選択するとEclipseプラグインになります。

  3.特に機能はいらないので「Hello RCP」を選択します。

③とりあえず、起動する。

  右下にあるテストの項目の、「Eclipseアプリケーションの起動」をクリックします。

  何も無い画面だけが表示されます。

④ブラウザ表示用にViewを追加します。
  1.plugin.xmlを開きます。
  2.拡張タブを選択します。
  3.追加ボタンをクリックします。
  4.「org.eclipse.ui.views」を追加します。


  5.追加された「org.eclipse.ui.views」を右クリックして
   以下のようにviewを選択します。

  6.追加されたviewを選択して以下のように入力します。

  7.以下のように「com.lancard.mybrowser.view.MyBrowserView」クラスを作成します。

package com.lancard.mybrowser.view;

import org.eclipse.swt.SWT;
import org.eclipse.swt.browser.Browser;
import org.eclipse.swt.layout.RowData;
import org.eclipse.swt.layout.RowLayout;
import org.eclipse.swt.widgets.Composite;
import org.eclipse.ui.part.ViewPart;

public class MyBrowserView extends ViewPart {

public static final String ID = "com.lancard.mybrowser.view.MyBrowserView";

private Browser browser = null;

public void createPartControl(Composite parent) {
Composite top = new Composite(parent, SWT.NONE);
RowLayout layout = new RowLayout(SWT.VERTICAL);
layout.wrap = true;
top.setLayout(layout);

browser(top);

}

private void browser(Composite top){
Composite obj = new Composite(top, SWT.NONE);
RowLayout layout = new RowLayout(SWT.HORIZONTAL);
layout.wrap = true;
obj.setLayout(layout);

browser = new Browser(obj,SWT.BORDER);
browser.setUrl("https://www.google.co.jp");
browser.setLayoutData(new RowData(800,500));
}

public void setFocus() {
}


}

⑤ブラウザを表示するコマンドを追加します。
  1.plugin.xmlを開きます。
  2.拡張タブを選択します。
  3.追加ボタンをクリックします。
  4.「org.eclipse.ui.commands」を追加します。


  5.追加された「org.eclipse.ui.commands」を右クリックして
   以下のようにcommandを選択します。

  6.追加されたcommandを選択して以下のように入力します。

  7.以下のように「com.lancard.mybrowser.action.MyBrowserAction」クラスを作成します。

package com.lancard.mybrowser.action;

import org.eclipse.jface.action.Action;
import org.eclipse.jface.dialogs.MessageDialog;
import org.eclipse.ui.IWorkbenchPage;
import org.eclipse.ui.IWorkbenchWindow;
import org.eclipse.ui.PartInitException;

import com.lancard.mybrowser.ICommandIds;

public class MyBrowserAction extends Action {

private final IWorkbenchWindow window;
private int instanceNum = 0;
private final String viewId;

public MyBrowserAction(IWorkbenchWindow window, String label, String viewId) {
this.window = window;
this.viewId = viewId;
        setText(label);
setId(ICommandIds.CMD_MY_BROWSER);
}

public void run() {
if(window != null) {
try {
window.getActivePage().showView(viewId, Integer.toString(instanceNum++), IWorkbenchPage.VIEW_ACTIVATE);
} catch (PartInitException e) {
MessageDialog.openError(window.getShell(), "Error", "Error opening view:" + e.getMessage());
}
}
}
}

「com.lancard.mybrowser.ICommandIds」は以下のように記述します。

package com.lancard.mybrowser;

public interface ICommandIds {

    public static final String CMD_MY_BROWSER = "com.lancard.mybrowser.mybrowser";
    
}

⑥メニューを追加してみます。
  メニューを追加するには、自動的に作成されている
  「com.lancard.mybrowser.ApplicationActionBarAdvisor」クラスに以下のように記述します。

package com.lancard.mybrowser;

import org.eclipse.jface.action.IMenuManager;
import org.eclipse.jface.action.MenuManager;
import org.eclipse.ui.IWorkbenchActionConstants;
import org.eclipse.ui.IWorkbenchWindow;
import org.eclipse.ui.application.ActionBarAdvisor;
import org.eclipse.ui.application.IActionBarConfigurer;

import com.lancard.mybrowser.action.MyBrowserAction;
import com.lancard.mybrowser.view.MyBrowserView;

public class ApplicationActionBarAdvisor extends ActionBarAdvisor {

    private MyBrowserAction myBrowserAction;
    public ApplicationActionBarAdvisor(IActionBarConfigurer configurer) {
        super(configurer);
    }

    protected void makeActions(IWorkbenchWindow window) {
    myBrowserAction = new MyBrowserAction(window, "ブラウザ", MyBrowserView.ID);
        register(myBrowserAction);
    }

    protected void fillMenuBar(IMenuManager menuBar) {
        MenuManager fileMenu = new MenuManager("&メニュー", IWorkbenchActionConstants.M_FILE);
        
        menuBar.add(fileMenu);
        
        fileMenu.add(myBrowserAction);
    }
    
}

⑦構成
この時点でプロジェクトの構成はこのようになっています。

⑧起動してみる。

  今度は右上にメニューが出来ていて中にはブラウザメニューがあります。

  ブラウザメニューを選択すると、作成したブラウザビューが表示されます。

⑨製品化する。
  このままだと、Eclipseを起動しないと使えないので製品化する作業をします。

  1.MyBrowserプロジェクトを選択して、右クリックします。
  2.新規メニューから製品構成を選択します。

  3.以下のように入力して、完了ボタンをクリックします。

    「MyBrowser.product」というファイルが追加されます。
  4.「MyBrowser.product」を開きます。
  5.概要タブを選択し、以下のように記述します。

    「新規」ボタンをクリックします。

    次のように入力して完了をクリックします。

    次のようになります。

  6.依存関係タブを選択し、追加ボタンをクリック。
    「MyBrowser」があると思うので選択して「OK」をクリック。

    「必須プラグインの追加」ボタンをクリックします。

  7.起動タブを選択し、以下のように入力します。

  8.概要タブのエクスポートの項目にある
   「Eclipse製品エクスポート・ウィザード」をクリックします。

    ディレクトリーは適当な場所にして、完了をクリックします。

  9.2つのフォルダが出来ます。

  10.mybrowserの中にある「MyBrowser」を起動します。

  11.ちゃんと動きました。
    しかし、ソース上に書いた文字は文字化けします。

⑩国際化対応
  文字がソース上にそのまま書いてあるため、文字化けしている状態になります。
  国際化対応するための機構があるので国際化対応します。

  1.「com.lancard.mybrowser.resource」パッケージを作成します。
  2.「custom_ja.properties」というファイルを作成します。

    ファイルの中は次のように記述します。
MENU=&メニュー
BROWSER=ブラウザ

  3.「com.lancard.mybrowser.CustomString」クラスを作成します。

package com.lancard.mybrowser;

import java.util.Locale;
import java.util.ResourceBundle;

public class CustomString {
private static final String BUNDLE_NAME = "com.lancard.mybrowser.resource.custom";
private static ResourceBundle rb = null;

public static void setBundle(Locale locale) {
try {
rb = ResourceBundle.getBundle(BUNDLE_NAME, locale);
} catch (Exception e) {
rb = ResourceBundle.getBundle(BUNDLE_NAME, Locale.JAPANESE);
}
}

public static String getString(String key) {
try {
String keyValue = new String(rb.getString(key).getBytes("ISO-8859-1"), "UTF-8");
return keyValue;
} catch (Exception e) {
e.printStackTrace();
return key;
}
}

}

  4.既に存在する「com.lancard.mybrowser.Application」クラスの
    startメソッドに次の一行を追加します。
    「CustomString.setBundle(Locale.getDefault());」

public Object start(IApplicationContext context) throws Exception {
CustomString.setBundle(Locale.getDefault());
Display display = PlatformUI.createDisplay();
try {
int returnCode = PlatformUI.createAndRunWorkbench(display, new ApplicationWorkbenchAdvisor());
if (returnCode == PlatformUI.RETURN_RESTART)
return IApplication.EXIT_RESTART;
else
return IApplication.EXIT_OK;
} finally {
display.dispose();
}

}

  5.「com.lancard.mybrowser.ApplicationActionBarAdvisor」の
    文字部分を次のように書き換えます。

package com.lancard.mybrowser;

import org.eclipse.jface.action.IMenuManager;
import org.eclipse.jface.action.MenuManager;
import org.eclipse.ui.IWorkbenchActionConstants;
import org.eclipse.ui.IWorkbenchWindow;
import org.eclipse.ui.application.ActionBarAdvisor;
import org.eclipse.ui.application.IActionBarConfigurer;

import com.lancard.mybrowser.action.MyBrowserAction;
import com.lancard.mybrowser.view.MyBrowserView;

public class ApplicationActionBarAdvisor extends ActionBarAdvisor {

    private MyBrowserAction myBrowserAction;
    public ApplicationActionBarAdvisor(IActionBarConfigurer configurer) {
        super(configurer);
    }

    protected void makeActions(IWorkbenchWindow window) {
    myBrowserAction = new MyBrowserAction(window, CustomString.getString("BROWSER"), MyBrowserView.ID);
        register(myBrowserAction);
    }

    protected void fillMenuBar(IMenuManager menuBar) {
        MenuManager fileMenu = new MenuManager(CustomString.getString("MENU"), IWorkbenchActionConstants.M_FILE);
        
        menuBar.add(fileMenu);
        
        fileMenu.add(myBrowserAction);
    }
    
}

  6.もう一度エクスポートします。
    今度は文字化けしていた部分もきちんと日本語が表示されました。

Facebooktwitterlinkedintumblrmail

PhpStorm(IntelliJ)のクリップボードマネージャ

PhpStormにはクリップボードマネージャ機能があり、クリップボードの履歴からペーストしたりすることができます。しかし私は別のクリップボードマネージャアプリを使用しており、そのアプリから貼り付けたいのですが、機能がバッティングしてしまいうまく動作しません。

調べたところシステムのクリップボード領域とPhpStormのクリップボード領域を同期する設定をすることで正しく動作するようになりました。

idea.use.alt.clipboard.sync=trueを/Applications/PhpStorm.app/bin/idea.vmoptionsに追記するだけでOKです。

参考

Switching clipboard content with system clipboard manager does not work in rubymine (Ubuntu)

Facebooktwitterlinkedintumblrmail

RoudcubeプラグインでAjaxする

RoudcubeプラグインでAjaxする方法を紹介します。

サーバ側:

rc = rcmail::get_instance();

$this->add_texts('localization/');
$this->register_task('ajax_sample');

if($this->rc->task == 'ajax_sample'){
$this->register_action('index', array($this, 'action'));
$this->register_action('get_data', array($this, 'action'));
}else{
$this->add_button(array(
'command' => 'ajax_sample',
'label' => 'ajax_sample.title'
), 'taskbar');
}
}

public function action(){
//画面表示
if($this->rc->action === 'index'){

$this->include_script('ajax_sample.js');
$this->rc->output->send('ajax_sample.ajax_sample');

//ajax
}else if($this->rc->action === 'get_data'){

error_log(get_input_value('data', RCUBE_INPUT_POST));
$this->rc->output->command('plugin.get_data', array('data' => 'test'));

}
}

}

クライアント側:

var get_data_call_back = function(response){
console.log(response.data);
}

if (window.rcmail) {
rcmail.addEventListener('init', function() {
rcmail.addEventListener('plugin.get_data', get_data_call_back);
rcmail.enable_command('get_data', true);
});
}

rcube_webmail.prototype.get_data = function()
{
rcmail.http_post('get_data',{"data":'test'});
}

①コールバックの登録
  クライアント側のrcmail.addEventListener(‘plugin.get_data’, get_data_call_back);の
  第一引数と
  サーバ側の$this->rc->output->command(‘plugin.get_data’, array(‘data’ => ‘test’));の
  第一引数を
  一致させる必要があります。

  この際に’plugin.’という文字を前につける必要があります。
  なぜなら/roundcuberoot/program/include/rcube_json_output.phpの
  141行目が次のようになっています。

    public function command()
    {
        $cmd = func_get_args();

        if (strpos($cmd[0], 'plugin.') === 0)
          $this->callbacks[] = $cmd;
        else
          $this->commands[] = $cmd;
    }

  ここでcallbacksに登録されないため

  /roundcuberoot/program/js/app.src.jsの6041行目

    // execute callback functions of plugins
    if (response.callbacks && response.callbacks.length) {
      for (var i=0; i < response.callbacks.length; i++)
        this.triggerEvent(response.callbacks[i][0], response.callbacks[i][1]);
    }

  この部分のコールバックとして実行されません。

②ポストするデータ
  rcmail.http_post('get_data',{"data":'test'});の第二引数で指定します。

③サーバから返すデータ
  $this->rc->output->command('plugin.get_data', array('data' => 'test'));の第二引数で指定します。

Facebooktwitterlinkedintumblrmail

Roundcubeのボタンの使い方

Roundcubeのボタンの使い方を紹介します。

①テンプレートへの設置方法は以下のようになります。


このように書いておくと、次のように出力されます。


②イベントをどう処理するか?

このように書きます。

if (window.rcmail) {
rcmail.addEventListener('init', function() {
rcmail.enable_command('get_data', true);
});
}

rcube_webmail.prototype.get_data = function()
{
console.log('get_data');
}

③rcmail.enable_command(‘get_data’, true);の
 最後の引数でそのボタンを有効にするか無効にするか指定します。
  試しに2つのボタンを設置してみます。


デフォルトではどちらも無効になります。

次のようにjavascriptを記述します。

if (window.rcmail) {
rcmail.addEventListener('init', function() {
rcmail.enable_command('btn1', true);
rcmail.enable_command('btn2', false);
});
}
rcube_webmail.prototype.btn1 = function()
{
console.log('btn1');
}
rcube_webmail.prototype.btn2 = function()
{
console.log('btn2');
}

ボタンは2つとも見かけ上有効になります。
しかし、ボタン1をクリックするとコンソールに’btn1’が表示されますが、ボタン2をクリックしても何も起こりません。

④引数を渡すにはどうするか。

prop属性を指定します。
このように書くと


次のように出力してくれます。


  rcmail.command(‘btn1′,’test’,this)この部分の第二引数にpropで指定した値が入ってきます。

  javascript側では第一引数で取得します。

rcube_webmail.prototype.btn1 = function(value)
{
console.log(value);
}

上記のように記述するとコンソールに’test’と表示されます。

⑤複数の引数を指定出来るか。

ボタンのclick処理を出力するのは
/roundcuberoot/program/include/rcube_template.phpの978行目の以下のコードになります。

$attrib['onclick'] = sprintf(
"return %s.command('%s','%s',this)",
JS_OBJECT_NAME,
$command,
$attrib['prop']
);

上記のコードの通り、複数の引数を指定することは無理そうですね・・。

Facebooktwitterlinkedintumblrmail

Roundcubeプラグインの作り方

①プラグインは roundcuberoot/plugins配下に作成します。
 (既にたくさん入っているようです。)

②作成したディレクトリ名と同じ名前のphpファイルを作成します。

③②で作成したphpファイルと同じ名前のクラス名にします。
④作成したクラスはrcube_pluginクラスを継承しなければなりません。


⑤プラグインクラス(/roundcuberoot/program/include/rcube_plugin.php)の
 抽象メソッドであるinitメソッドをオーバーライドします。

abstract function init();

 initメソッドは必須になります。

 プラグインAPIクラス(/roundcuberoot/program/include/rcube_plugin_api.php)は、
 プラグインオブジェクトをインスタンス化し、initメソッドを呼び出します。


これで何にもしないプラグインは出来上がりです。

⑥でも、これだと出来たかどうかわからないのでタスクバーにボタンを追加します。

add_texts('localization/');
        
        $this->add_button(array(
                'command'    => 'sample',
                'label'      => 'sample.sample',
        ), 'taskbar');
    }
}

⑦ja_JP.incファイル


以下のように配置します。

⑧最後に/roundcuberoot/config/main.inc.phpに
 プラグインを登録します。

$rcmail_config['plugins'] = array('sample');

これでサンプルメニューのプラグインの出来上がりです。

Facebooktwitterlinkedintumblrmail